Here it is! My
amazing Mini Bismark recipe. I love to
bake, and I recently discovered this amazing BAKED donut! I made them mini so when I eat 7 in one
day I don't feel as guilty, after all, because they are mini it is like only
eating one! I have included step by step
pictures so that you too can learn to make and enjoy such yummy goodness.
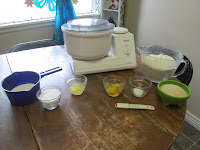
1 cup warm
milk
1/3 cup
warm water
2 tsp
instant yeast
2 TB melted
butter
2/3 cup granulated sugar
2 large
eggs
4 1/2 - 5
cups all-purpose flour
A pinch of
nutmeg (about 1/8 tsp)
1 tsp salt
Measure 1 cup milk and place into microwave safe
bowl. Cook for about 1 1/2 minutes until
warm. Set aside.
Measure 1/3
cup warm water into small bowl. DO NOT
make the water any hotter than "baby bottle" warm or you will
"kill" the yeast. Add 2 tsp
yeast and a tiny bit of sugar and stir.
Set mixture aside. (This is called "proofing" the yeast).
Into mixer, pour warm milk, 2/3 cup sugar, 2 TB melted
butter, 2 large eggs, pinch of nutmeg, 1 tsp salt. Mix well.
Add in about 1/2 the flour (about 2 cups). Add in yeast mixture. (Your yeast should look soft and foamy before
adding it to the mixing bowl.) Mix in up
to 3 more cups of flour. You want to
make a soft, slightly sticky dough. (If
your dough turns out too "tough" add a LITTLE bit of milk until
slightly sticky.) Mix for just a few
(2-3) minutes.
 | |
| Yeast before you add it |
 |
| Dough will be slightly sticky |
Step 5:
Dump dough
into greased bowl. Cover with a clean
towel and let rise for about 1 hour, or until double in size.
Pour 3 1/2 cups cold milk and 2 small packages of pudding
flavor of your choice. (I used
cheesecake in this one, but I have also used vanilla and I will use
chocolate in the future. Just whatever suits
your fancy!) Whisk according to package
directions. Place in fridge to
"set".
Step 6:
 When dough
is risen, roll out onto lightly floured "bread mat". (A bread mat is a mat that you can
use to keep your "mess" in one spot and keep your counters
clean. If interested, I will post how to
make a bread mat at a later time.) Roll
dough to about 1/4 inch thick. Using a
mini donut cutter (otherwise known as a shot glass - NO I don't drink, but the
glasses are just too cute!), cut out the donuts. Place cut donuts onto lightly greased cookie
sheet. Let rise until double in size.
Step 7:
Bake donuts
in 375 degree F oven until the bottoms are just golden, about 8 to 10
minutes. They should still be pale on
top, not golden and browned, and just barely baked through. Remove from the oven and let cool
.Step 8:
To make frosting, mix together the following into a bowl:
1/4 cup softened butter
1 TB baking cocoa
powder
1 lb powdered sugar
1 tsp vanilla
Milk to thin it all down
 Note: You don't want to make it too runny or it
won't "stick" to the donuts, and you don't want it too thick or it
won't "dip" easy. You want to
make sure it is "just right".
Frost the donuts by tipping them upside down into the frosting. Hold them over the bowl to slightly drip the excess frosting off. Set to "dry" on a cooling rack to await the filling.
After
"frosting" the donuts, fill them with the pudding mixture. To do this place the pudding into a cake
decorating bag that has been fitted with a "filling" tip. (A filling tip is super long and skinny and
puts the yummy goodness into the donuts!) Stick the skinny tip into the side of each nugget of goodness and squeeze lightly to fill the donut. Warning, this can get a bit messy if you "over fill" the tiny
bites of goodness!
 |
| This is what "oops" looks like! |
Step 11:
Store your
donuts in the fridge (that is, IF you have any left over by the end of the
day!)


They look delicious!
ReplyDelete